- Zero configuration needed
- No technical setup or Google approvals
- Your app is ready to accept user logins right away
Using Your Own Google Sign-In
If you are a Silver or Gold subscriber and want your users to see your app’s branding when signing in, you can connect your own Google OAuth client. This requires creating credentials through Google, but gives you complete control over the sign-in experience. What you’ll gain:- Your app name and logo in the Google sign-in flow (instead of Mocha’s)
- Professional, branded authentication experience
- Create a Google Cloud account (free)
- Set up a Google OAuth client (we’ll walk you through this)
- In Mocha, in your application settings, enter your client ID and client secret in the “Google Sign In” section
About Google OAuth Clients
We use the language “Google OAuth clients” but sometimes these are called “OAuth applications” or “credentials” by Google. These are simply the connection settings that let your app use Google sign-in with your own branding.Setting Up Your Google OAuth Client
- Go to the Google Developer Console
- Create a new project or select an existing one
- Search for and navigate to the “OAuth consent screen”
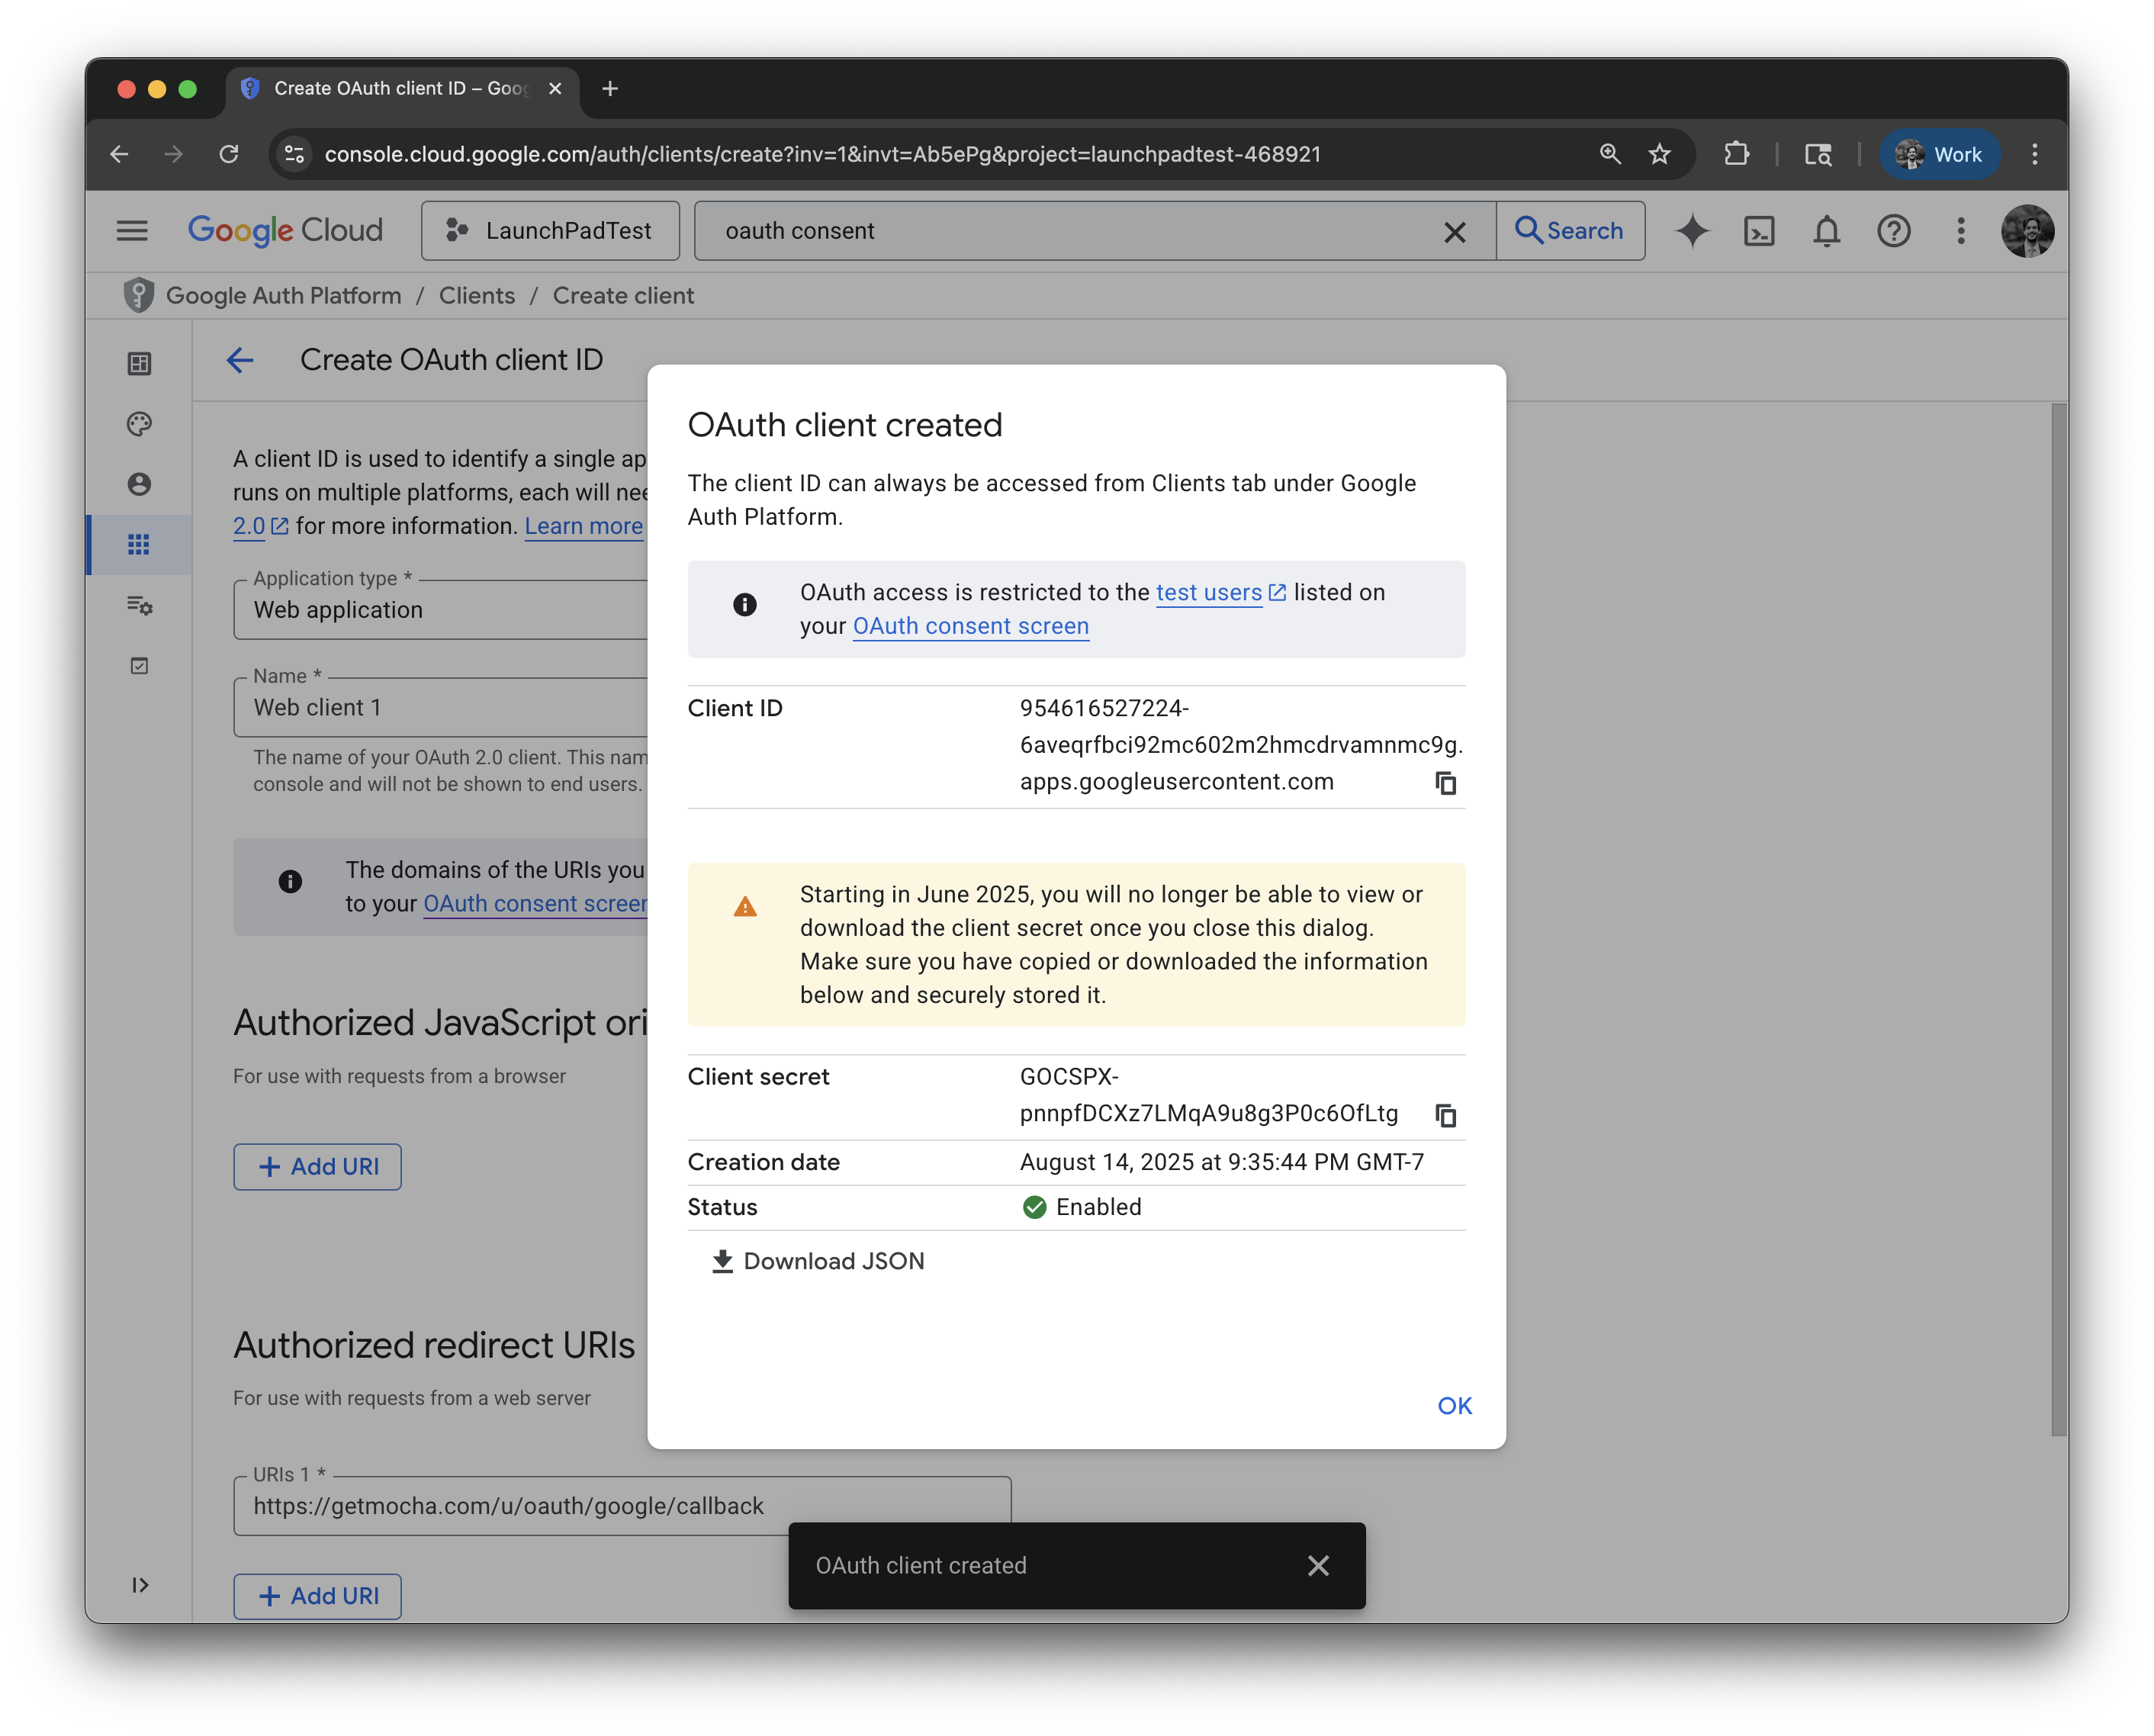
- Click on “Create OAuth client”
- Choose “Web application” as the application type
- Add Mocha’s redirect URI
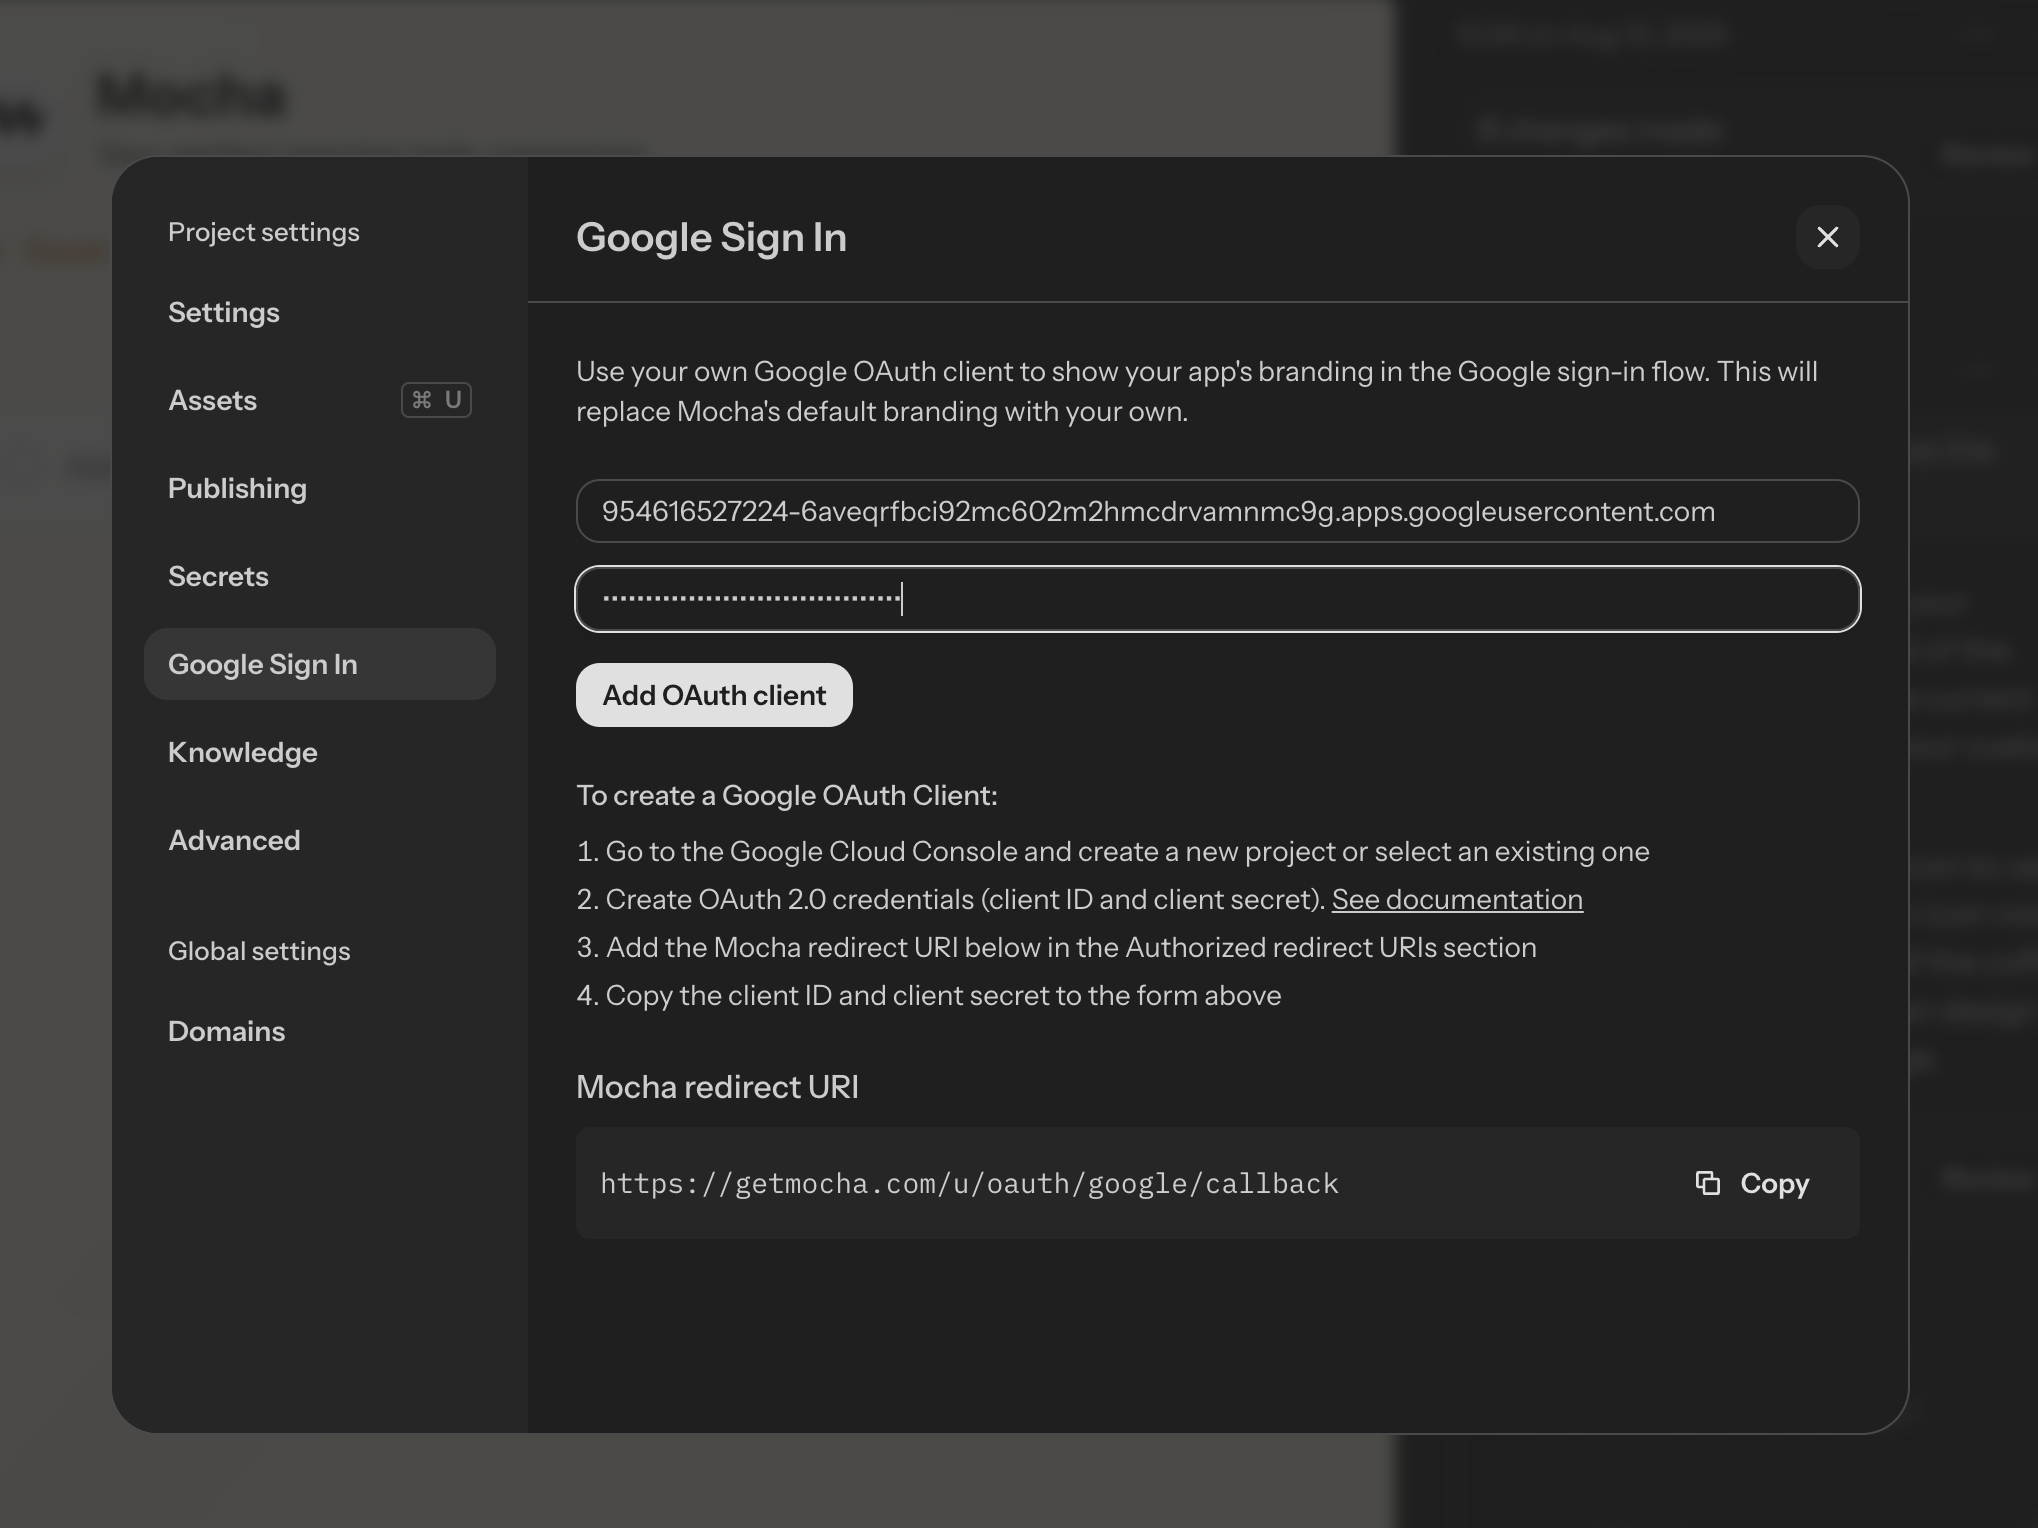
https://getmocha.com/u/oauth/google/callbackas one of the “Authorized redirect URIs” — this is critical for sign in to work - In your Mocha project, go to the “Google Sign In” section in the settings dialog and paste the client ID and client secret into the appropriate fields. Click “Add OAuth client”
- If your configuration is correct and your application is approved by Google, your app will immediately start using your custom OAuth client for signing in
Scopes
You might see information about scopes. At this time, Mocha only supportsemail profile scopes. This will be customizable in the future.