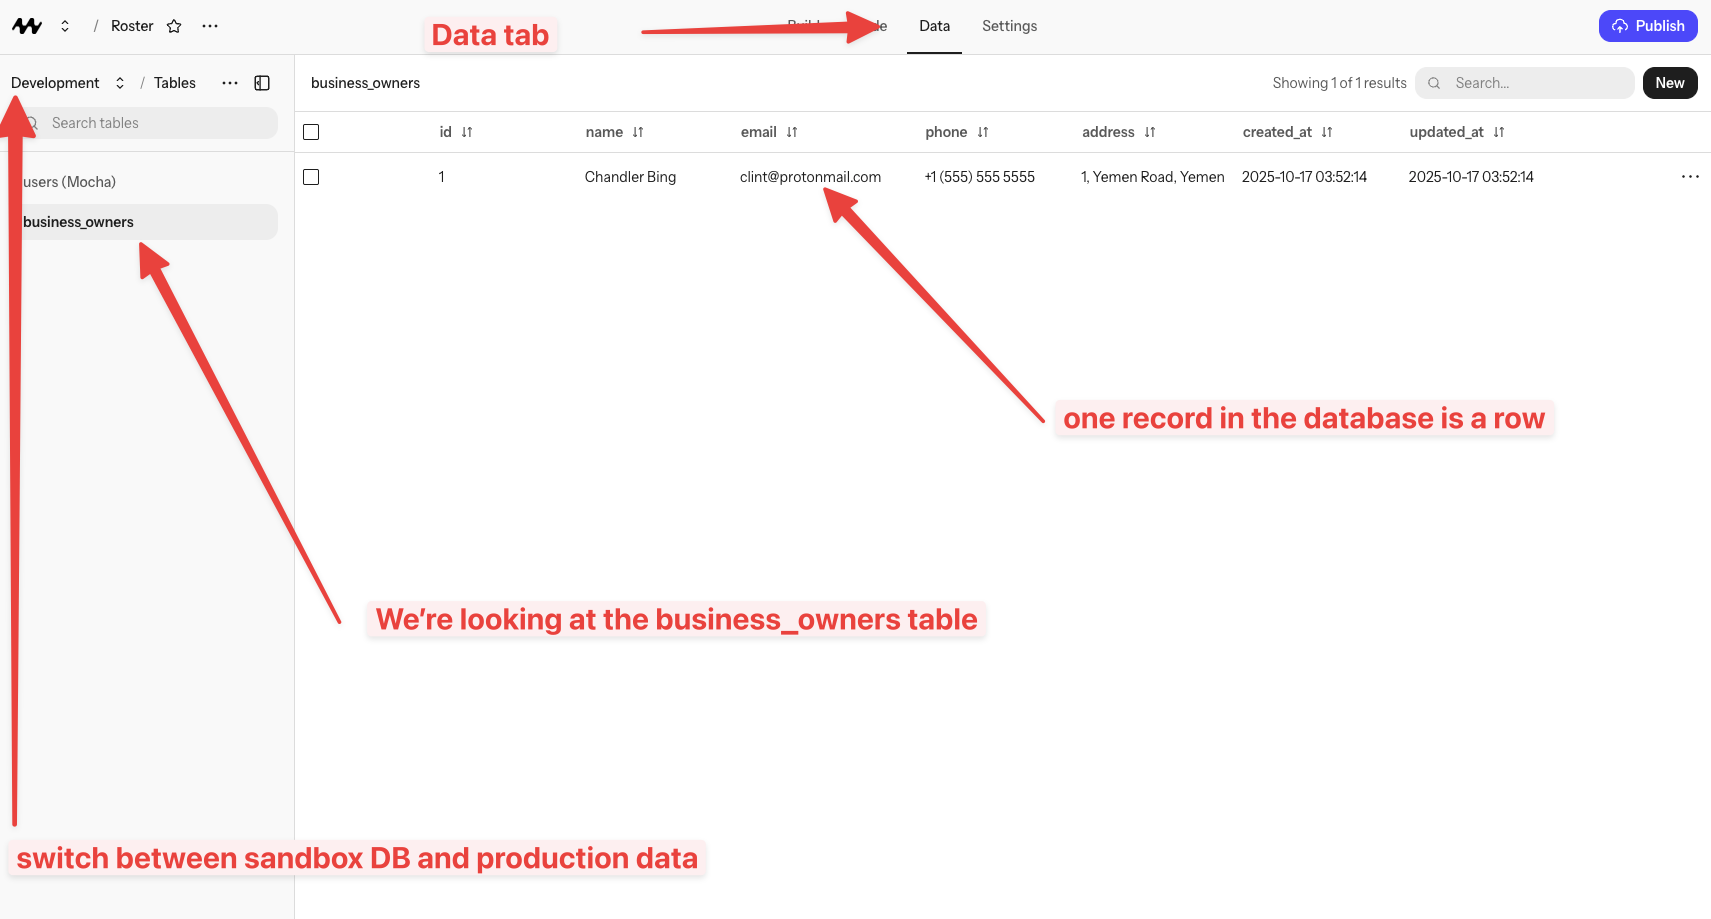
Overview of the Data tab
There are two databases per app: a Dev database for the in‑Mocha preview, and a Prod database for your deployed site. They do not share data.
Dev vs Prod
- Dev: Used while building and testing in the preview. Safe to experiment.
- Prod: Used by your deployed site. Data here is what real users see.
Quick start
1
View your tables
Open the Database tab to see your tables and recent rows.
2
Add or edit rows
Use the built‑in form UI to insert or edit rows. Great for testing quickly.
What you can ask the AI to do
How do I add data to my production database?
How do I add data to my production database?
If you want to add data to your production database, explicitly ask Mocha to do so, or create an upload mechanism and then upload the data through the published site.
How do I edit data in my production database?
How do I edit data in my production database?
If you want to edit data in your production database, explicitly ask Mocha to do so, or create an edit mechanism and then edit the data through the published site.
Data Ownership & Export FAQ
Do I own my data and code?
Do I own my data and code?
Yes, absolutely. You own everything you create with Mocha:
- The code generated for your app is yours
- The data stored in your database belongs to you
- You can download and export your project at any time
Can I download or export my source code?
Can I download or export my source code?
Yes! You can download your entire project’s source code at any time:
- Click the app name in the header
- Look for the “Download code” button
- Your project will download as a zip file
Can I export my data to CSV?
Can I export my data to CSV?
Yes, you can ask Mocha to add data export functionality to your app. For example, ask: “Add a button to export all users to CSV” and the AI will create the feature for you.For direct database access, you can also view and manage your data through the Data tab in the Mocha interface.
What database does Mocha use?
What database does Mocha use?
Mocha uses SQLite as the database for your apps. SQLite is a reliable, widely-used database that works well for most web applications.You don’t need to configure or manage the database—Mocha handles all of that for you.
Can I connect to an external database like PostgreSQL or MySQL?
Can I connect to an external database like PostgreSQL or MySQL?
No, Mocha apps use the built-in SQLite database. You cannot connect to external databases like PostgreSQL, MySQL, or MongoDB.This is by design—Mocha is built to work seamlessly without requiring you to set up and manage external services.
Where is my app hosted?
Where is my app hosted?
Mocha apps are hosted on Cloudflare’s global infrastructure. This means your app benefits from:
- Fast loading times worldwide
- Automatic scaling
- Built-in security and DDoS protection
- High availability
Am I locked into Mocha?
Am I locked into Mocha?
No, you’re not locked in. You can:
- Download your source code at any time
- Export your data through features you build
- Take your project elsewhere if needed
While you can take your code, some Mocha-specific features (like the built-in auth integration) would require adaptation to work outside of Mocha’s infrastructure.