What is Nano Banana Pro?
Google’s Gemini API provides powerful image generation capabilities through models like Gemini 2.5 Flash (Nano Banana) and Gemini 3 Pro Preview (Nano Banana Pro). These models can generate high-quality, photorealistic images from text descriptions, making them perfect for:- Product mockups: Create professional product shots for e-commerce and marketing
- Logo design: Generate logos with accurate text rendering
- Commercial photography: Studio-lit product photographs
- Conceptual artwork: Visualize ideas and concepts
Starting with the Right Prompt
The initial prompt you give Mocha is crucial for getting your project started on the right track. When building an app that uses image generation, you need to be specific about:- What types of images you want to generate: Clearly describe the image types and use cases
- How the images should be used: Explain how generated images fit into your app’s functionality
- Key features: List the main features you want, including image storage, download capabilities, and style options
- Technical requirements: Mention any specific models or services you want to use (like Gemini Nano Banana Pro)
- Design preferences: Describe the UI/UX style you’re aiming for
- A clear description of the app’s purpose and target users
- Specific features broken down into bullet points
- Technical requirements (Gemini Nano Banana Pro)
- Design preferences (premium and professional UI)
- Use case context (pitch decks and marketing materials)
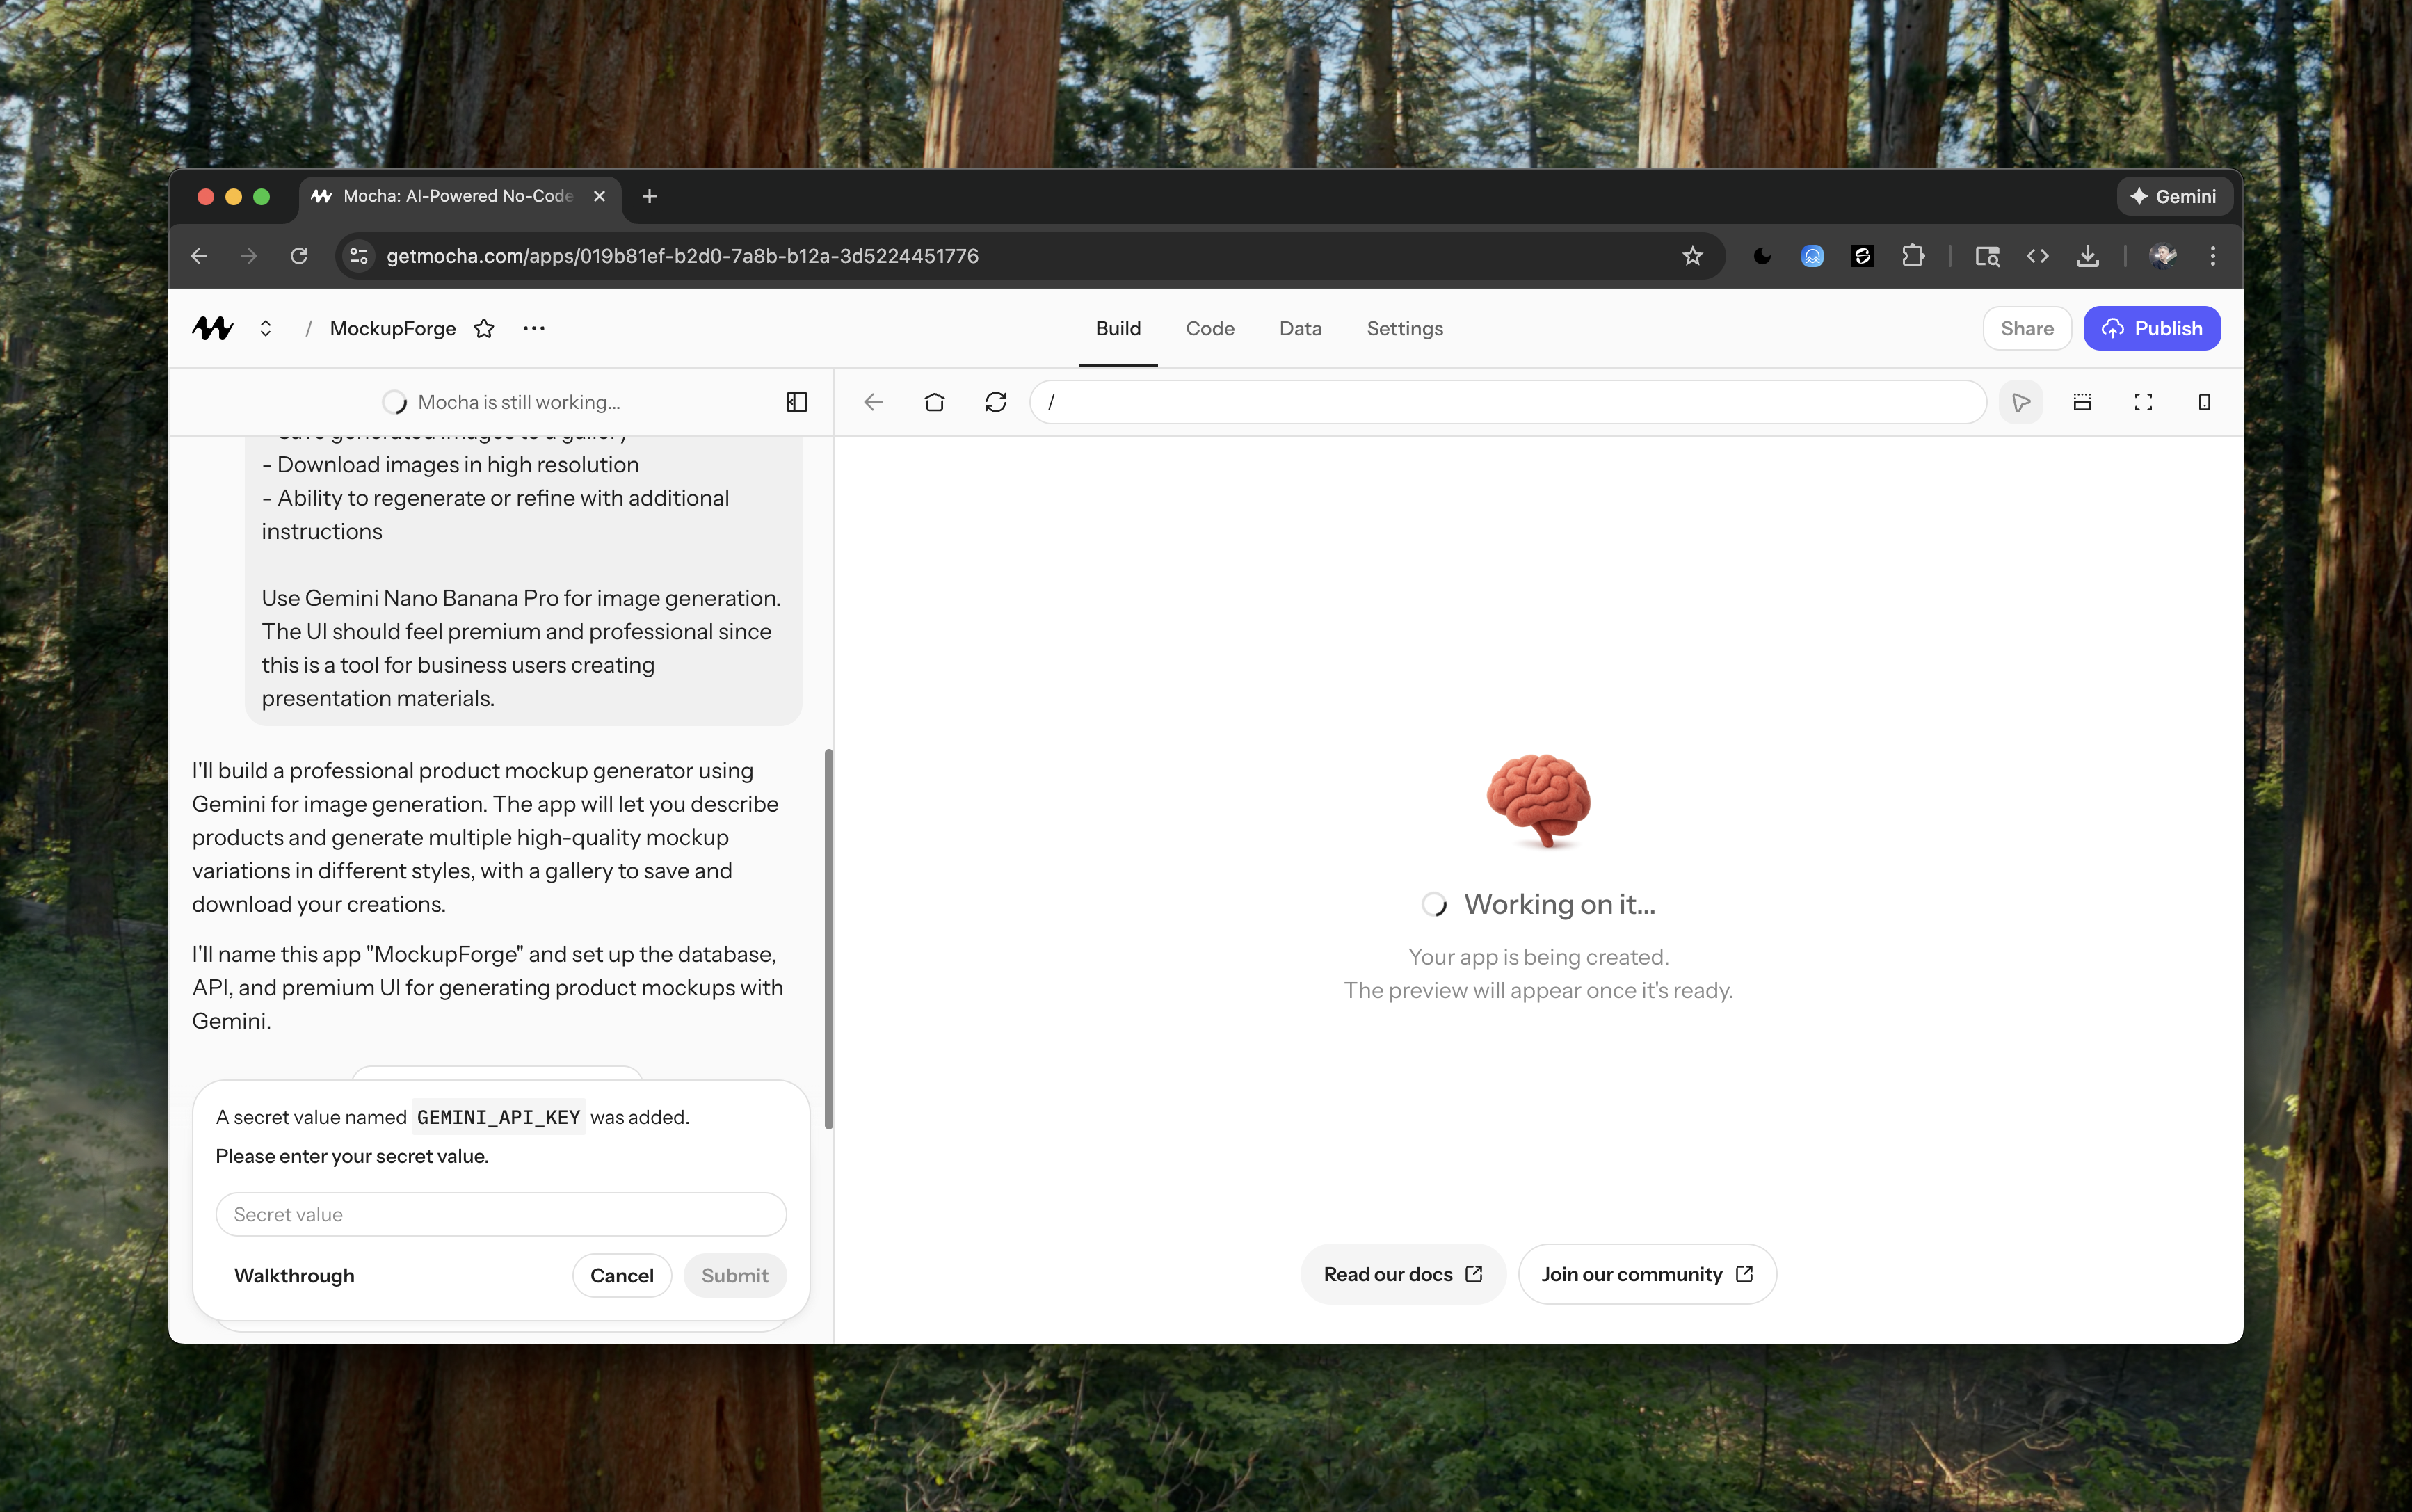
Setting up the Gemini API Key
During the build, you should see a prompt to add a secret for the Gemini API Key. Click the walkthrough button if you need guidance on how to add this key.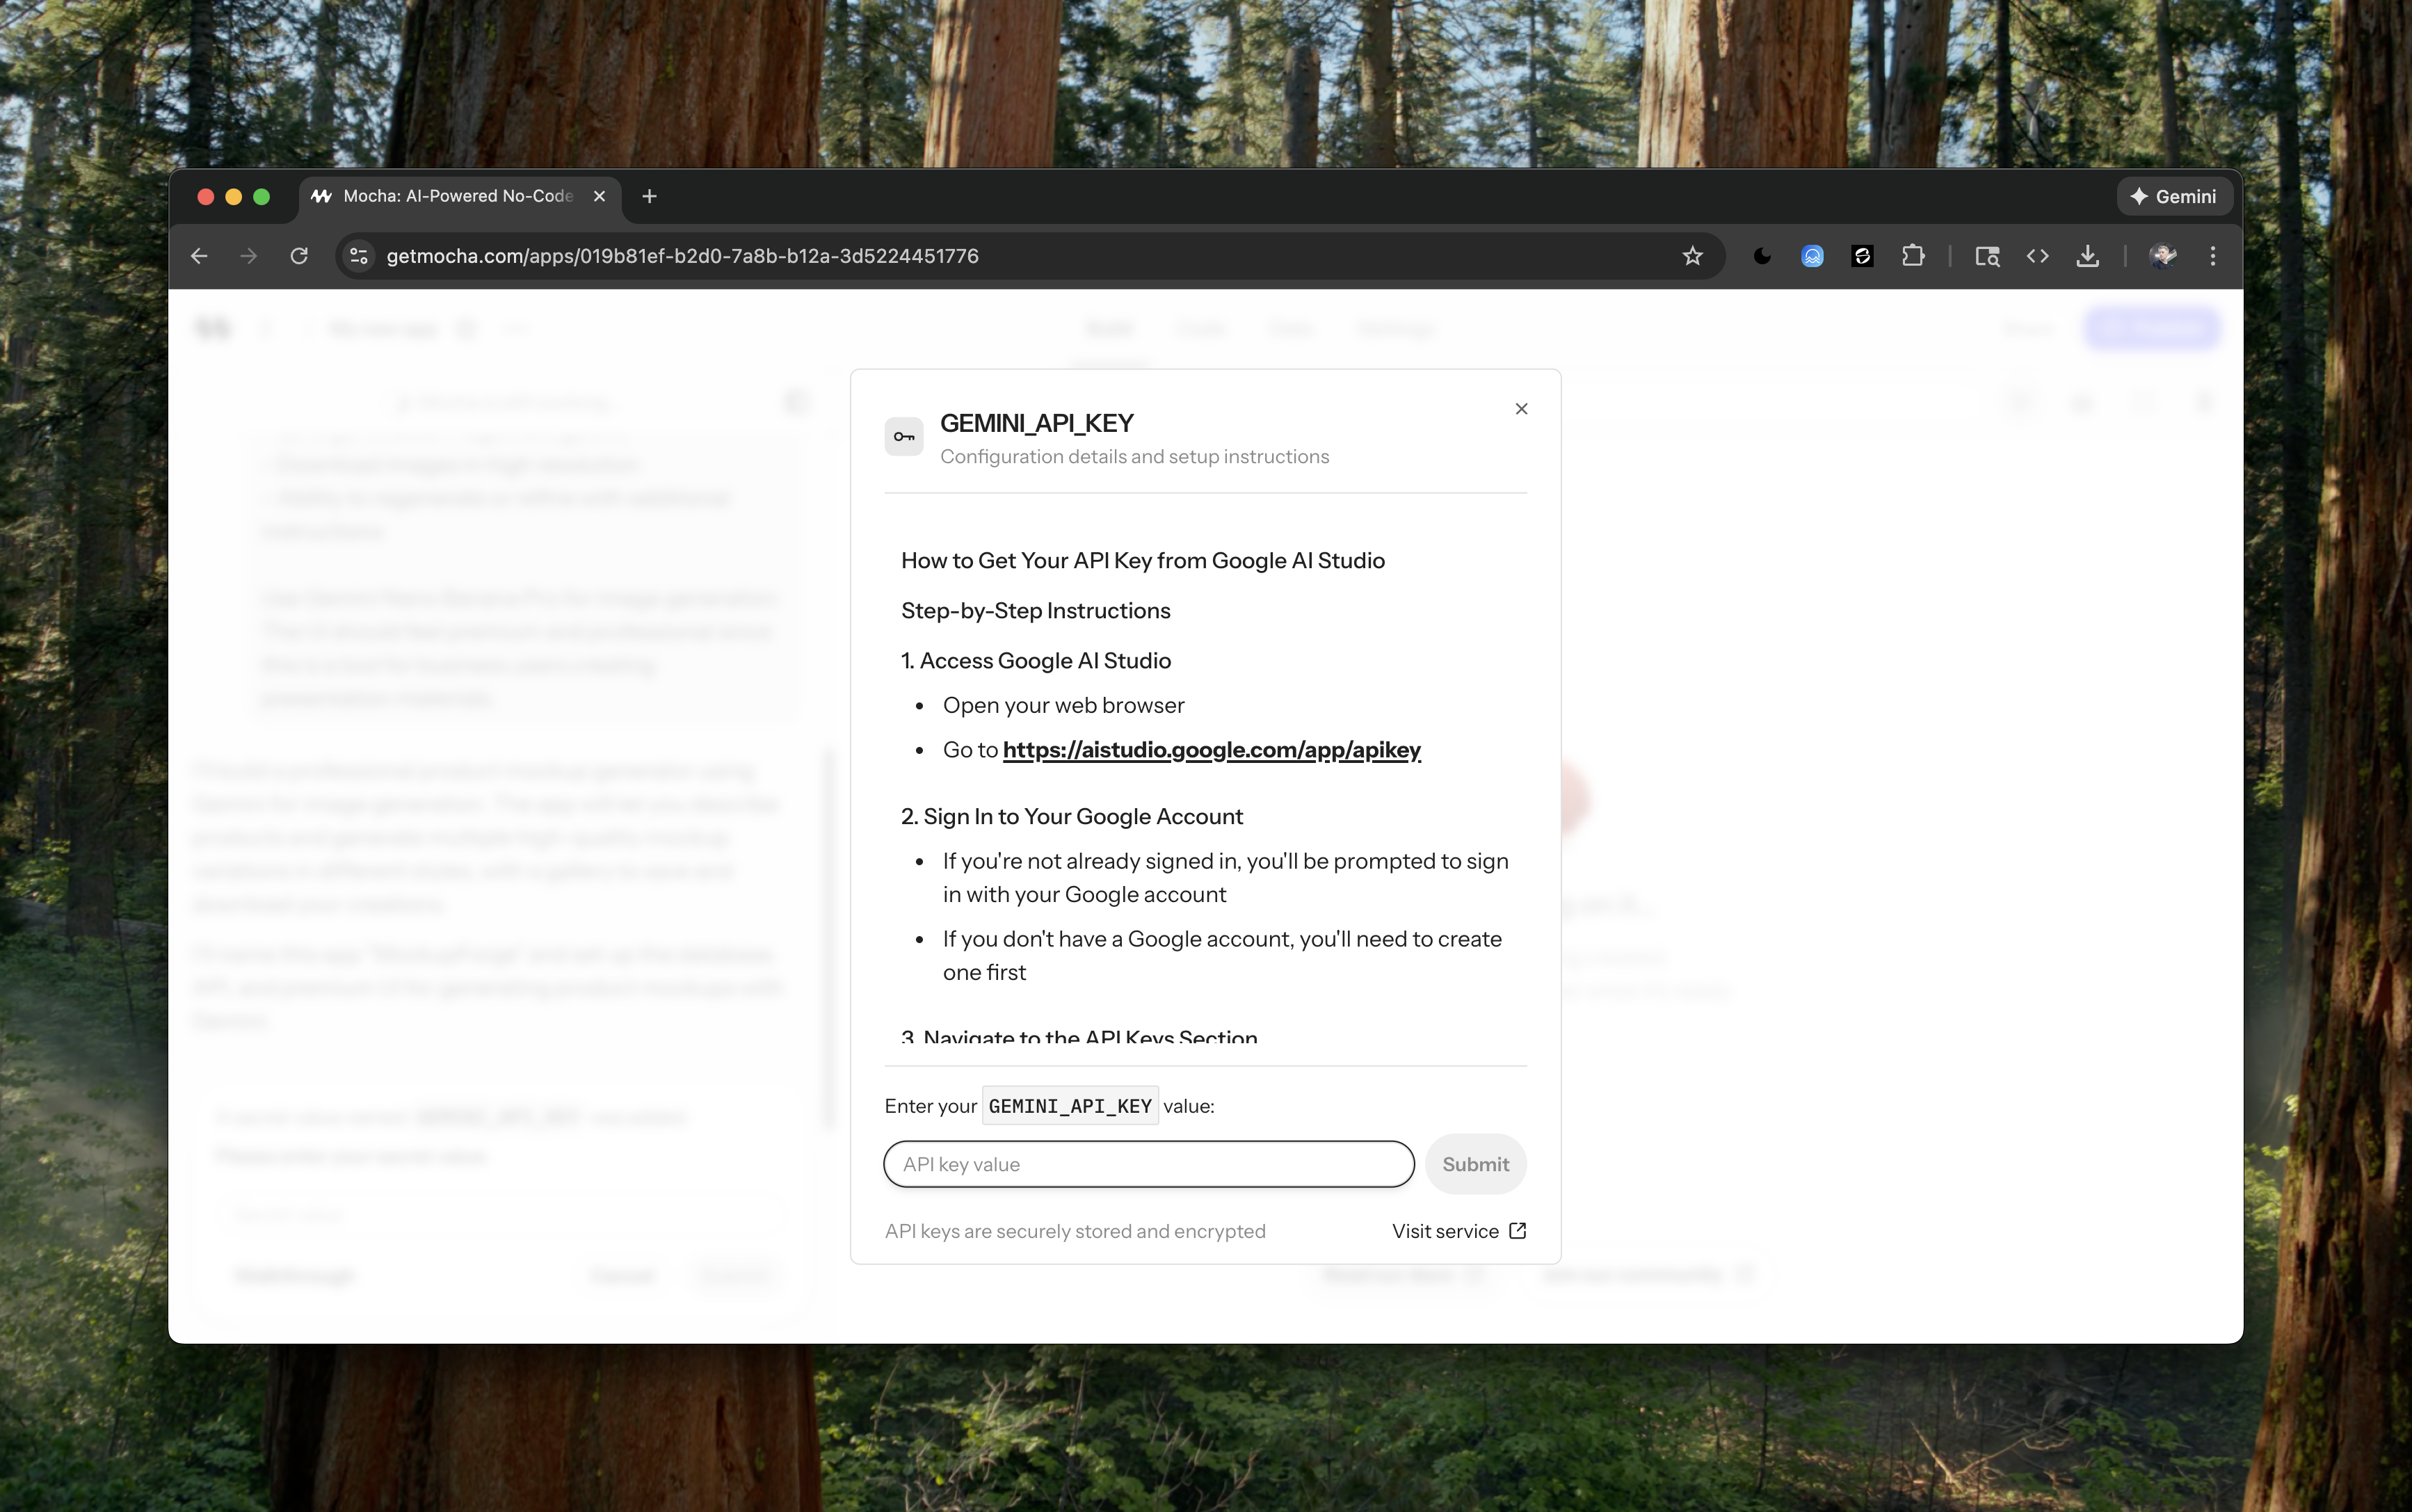
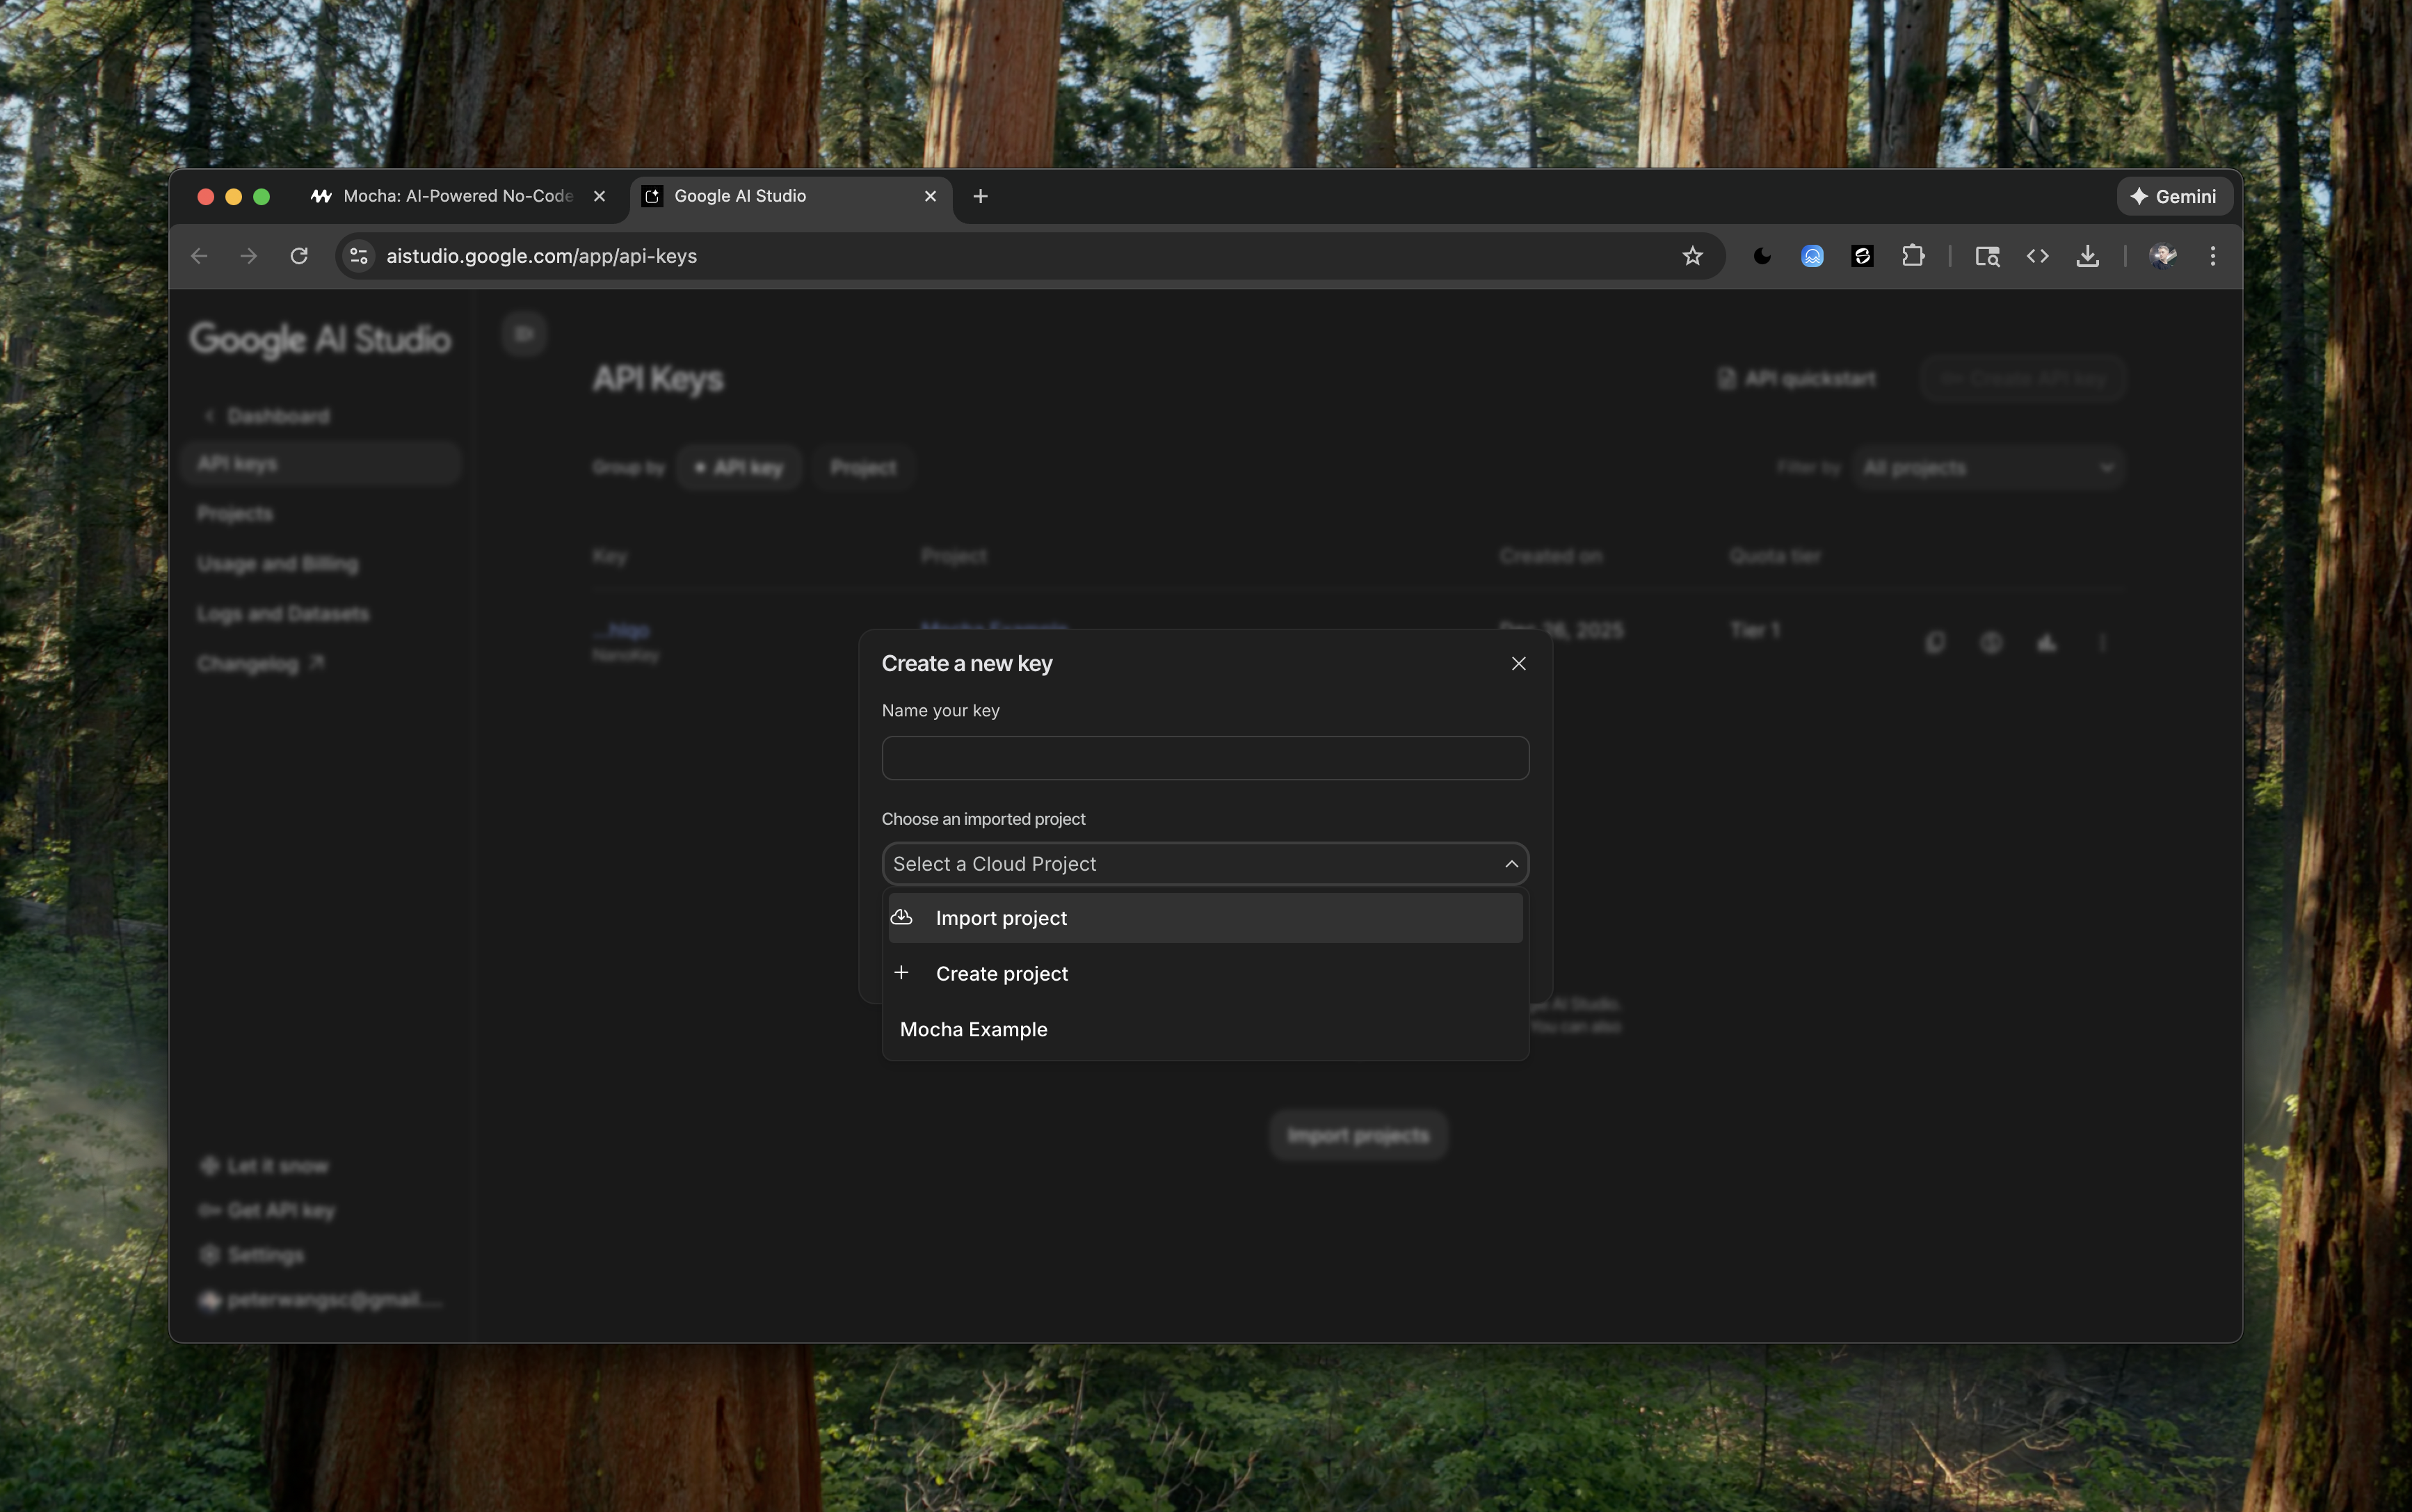
- Visit aistudio.google.com/app/apikey
- Sign in with your Google account
- Click “Create API Key” to generate a new key
- Copy the API key
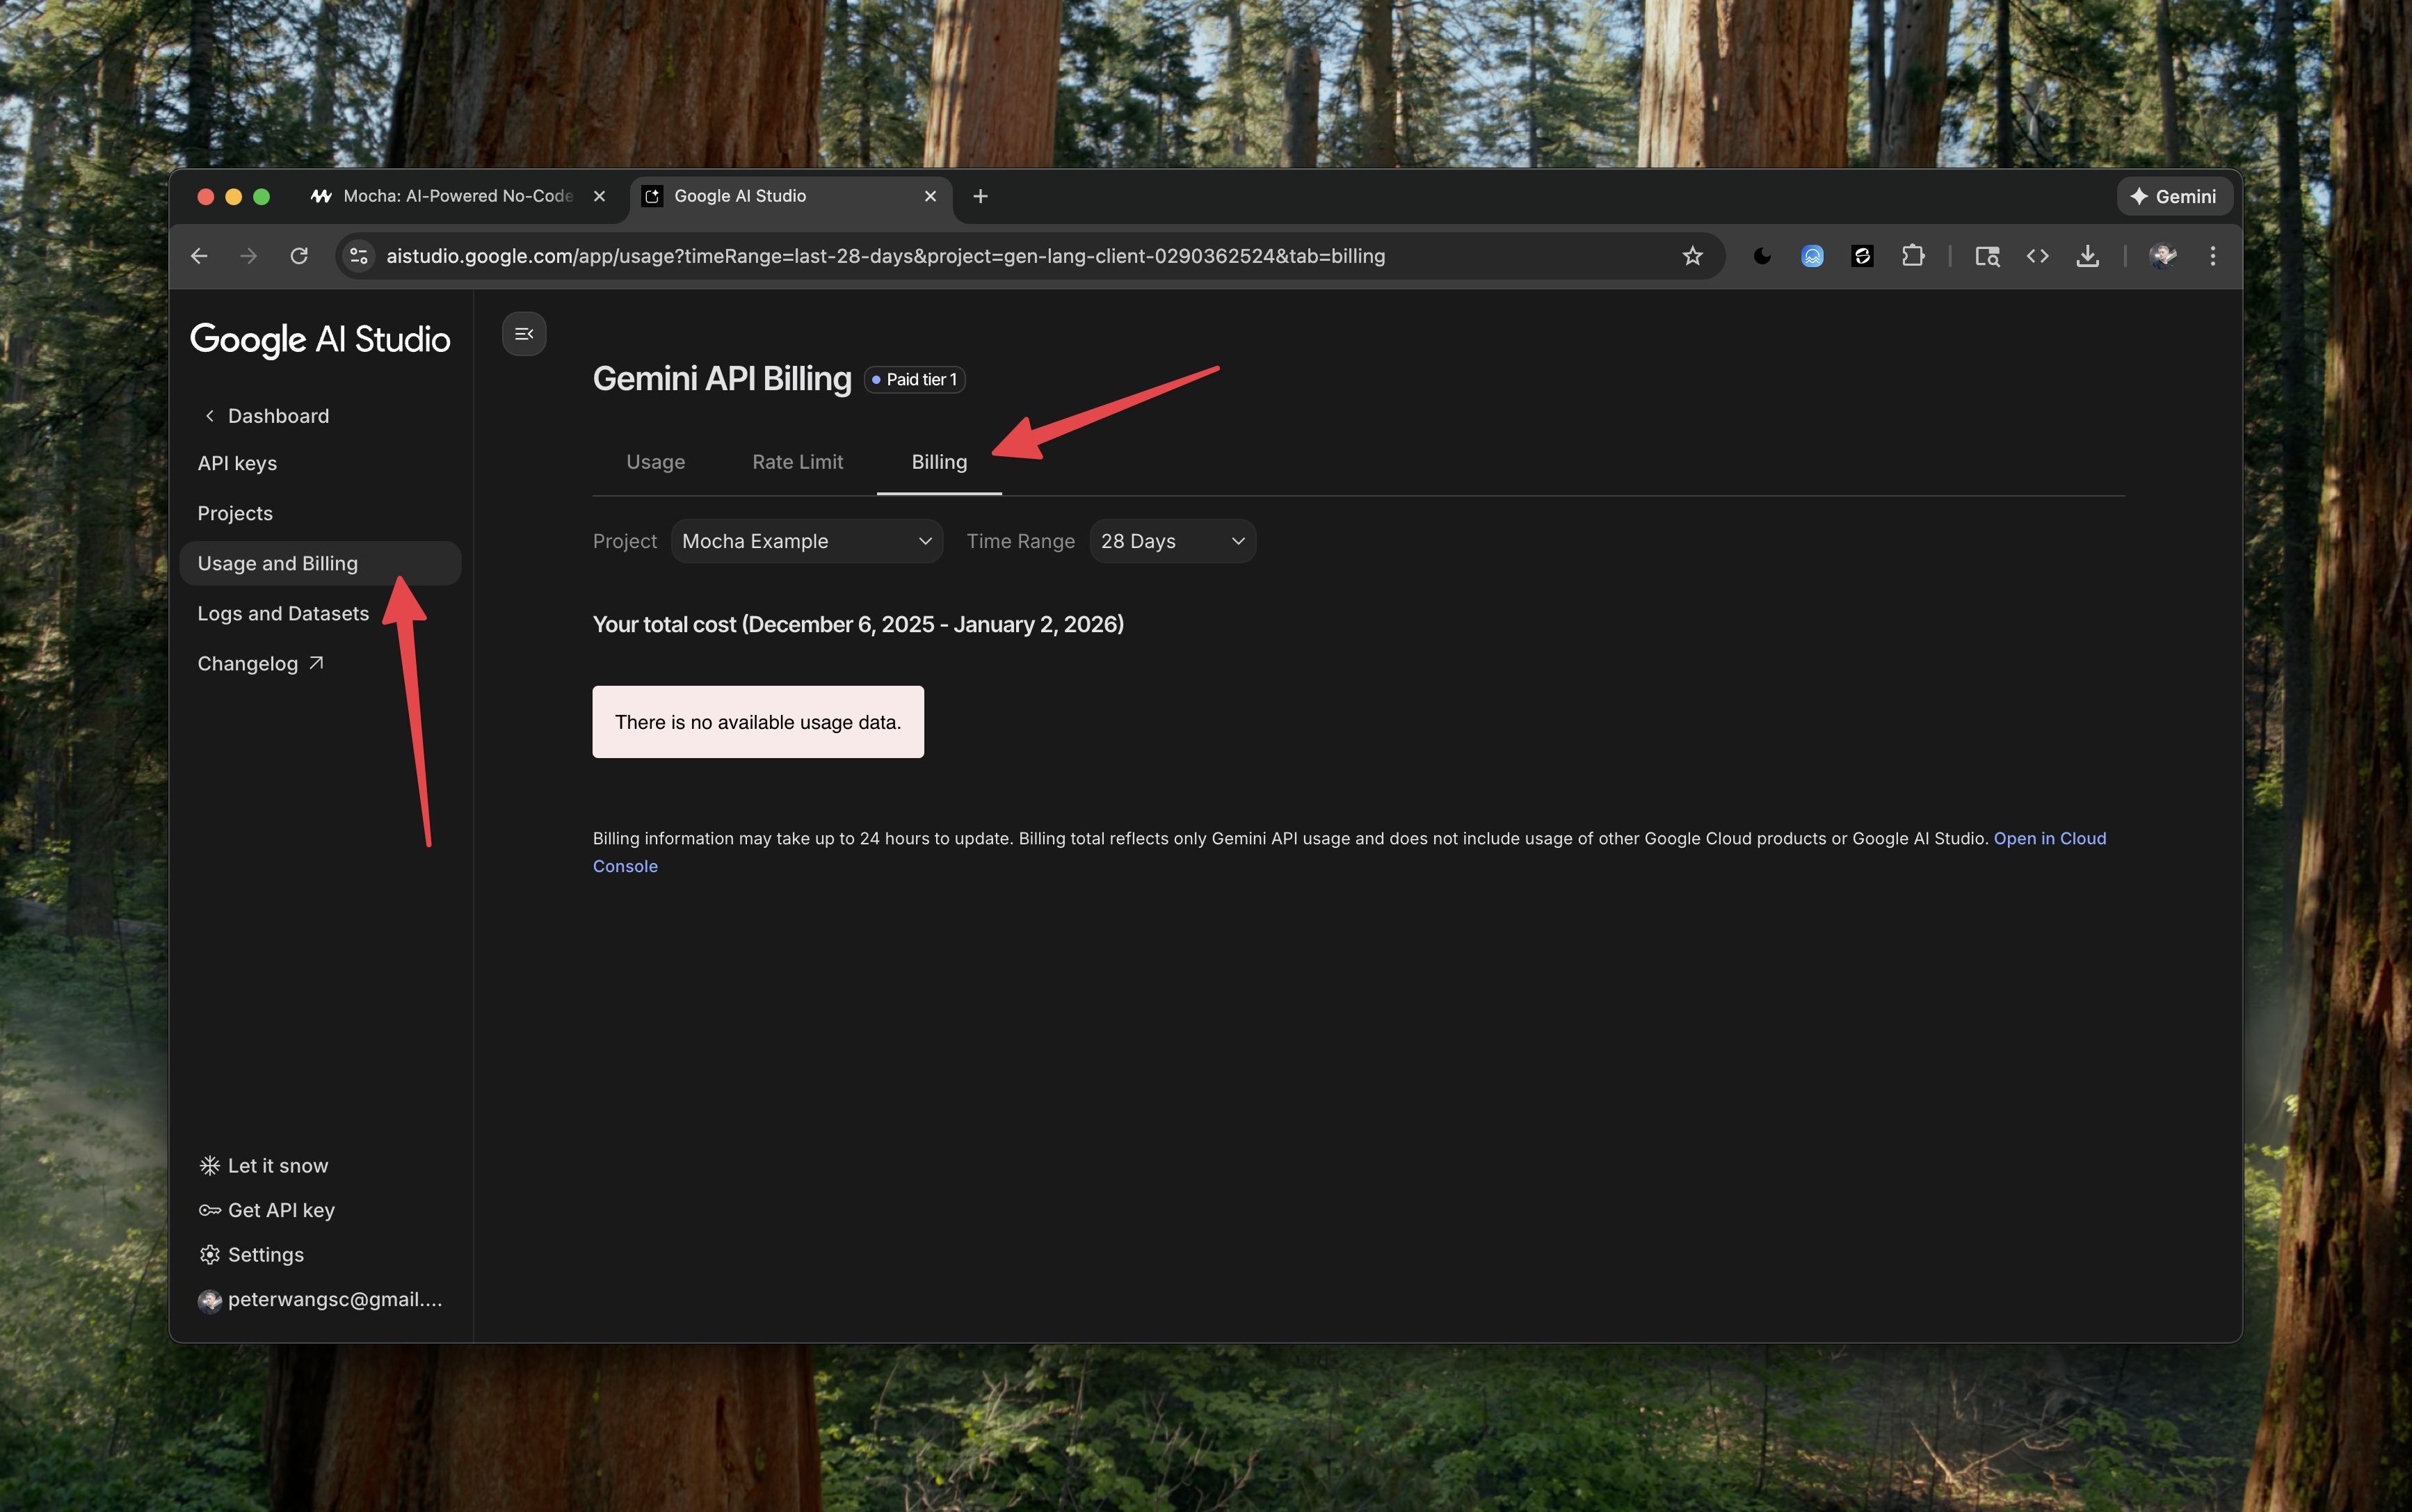
Enabling Billing for Image Generation
Important: Unlike some other APIs, Gemini’s image generation features require a billing account to be linked to your API key, even for free tier usage. After adding your API key, you may encounter quota errors when trying to generate images. If you see an error indicating that the quota limit has been exceeded or that the API key doesn’t have access to image generation, you’ll need to enable billing:- Go to ai.google.dev/usage to check your API usage and billing status
- Link a billing account to your Google Cloud project (even if you stay within free tier limits)
- Ensure your API key has access to the image generation models
Testing Image Generation
Wait until the app finishes building its initial version. This may take several minutes to complete the first loop of implementations. When done, test it out by generating your first image with a descriptive prompt. Try a prompt like:Debugging Image Generation Issues
If you encounter issues with image generation, here are common problems and solutions:Issue: Images not displaying correctly
You may find that generated images show as broken or display “invalid data”. This usually indicates that the image data isn’t being extracted correctly from the API response.Prompt to the AI
Ok I tried again after connecting my billing account and the image that it
generates has <img src=“data:image/png;base64,undefined”> and the image
shows invalid data as a label, downloading it resulted in a “check internet
connection” in my downloads. Please make sure the image is correctly rendered
from the API. Add console logs to help with the debug process.
- Adding console logging to inspect the API response structure
- Checking how the image data is extracted from the response
- Verifying the base64 encoding and data URI formatting
AI solution to the problem
I’ve added extensive logging to debug the image generation process. The logs
will show the full API response structure and help identify where the image
data is getting lost. Try generating another mockup and I’ll be able to see
exactly what the API is returning.
Issue: Quota exceeded errors
If you see quota errors, check:- Your billing account is properly linked (as mentioned above)
- You haven’t exceeded the free tier limits at ai.google.dev/usage
- Your API key has the correct permissions enabled
Issue: Wrong model being used
You may need to specify which Gemini model to use. The chat log shows switching fromgemini-2.5-flash-preview-image to gemini-3-pro-image-preview (also known as Nano Banana Pro) for better quality results.
Prompt to the AI
Let’s use the gemini-3-pro-image-preview model for image generation instead of
the current one.
Wrapping up
In this guide, we walked through the process of setting up a Mocha app that has image generation capabilities using Google’s Gemini API. We covered:- How to craft an effective initial prompt
- Setting up the Gemini API key
- The importance of enabling billing (even for free tier)
- Debugging common image generation issues